How to Disassemble an Omen 17W104 HP Laptop
In this article we will see the process of disassembly of the HP Omen 17W104 PC step by step in order to repair or clean it.
Tools used in this video:
- my disassembly tool: http://bit.ly/35pQoW9
- my electric screwdriver: https://amzn.to/3aiDx9B
To start, turn the PC and first unscrew the hatch and the screws holding the lower plastic part:

- removal of the hatch screws
- removal of memory bars (optional but useful in case of RAM change)
- removal of plastic buffers
- removal of screws under these buffers
To remove the plastic parts, click all along the PC using my tool available here http://bit.ly/35pQoW9 :
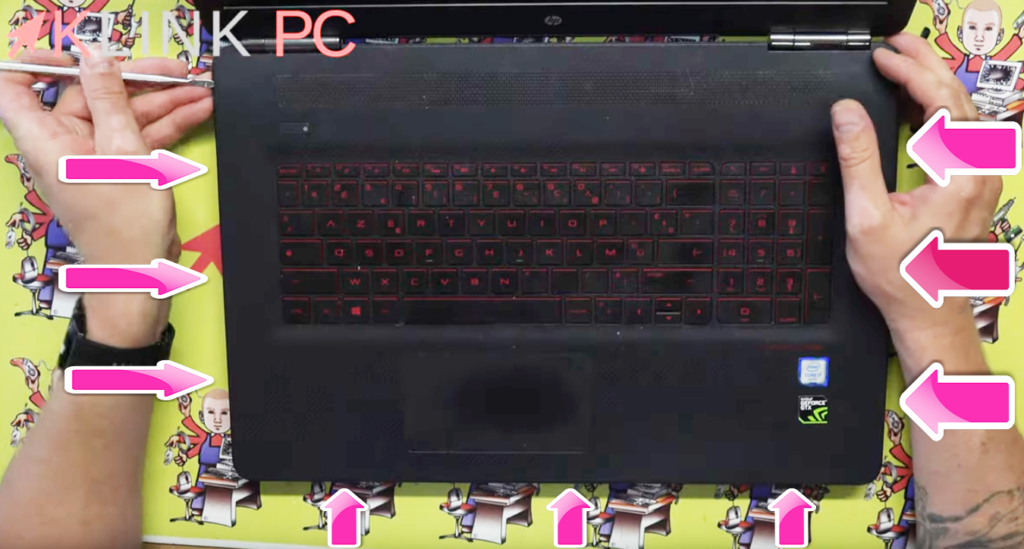
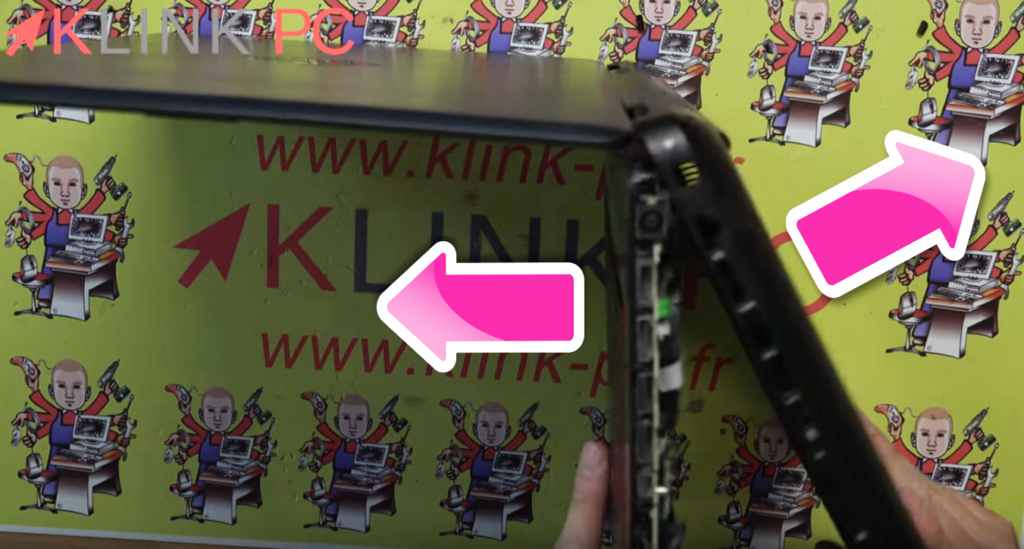
You can also put it on the slice and see if the parts come off each other:
Once the lower plastic part is removed, you arrive on the back of the PC with all visible components:
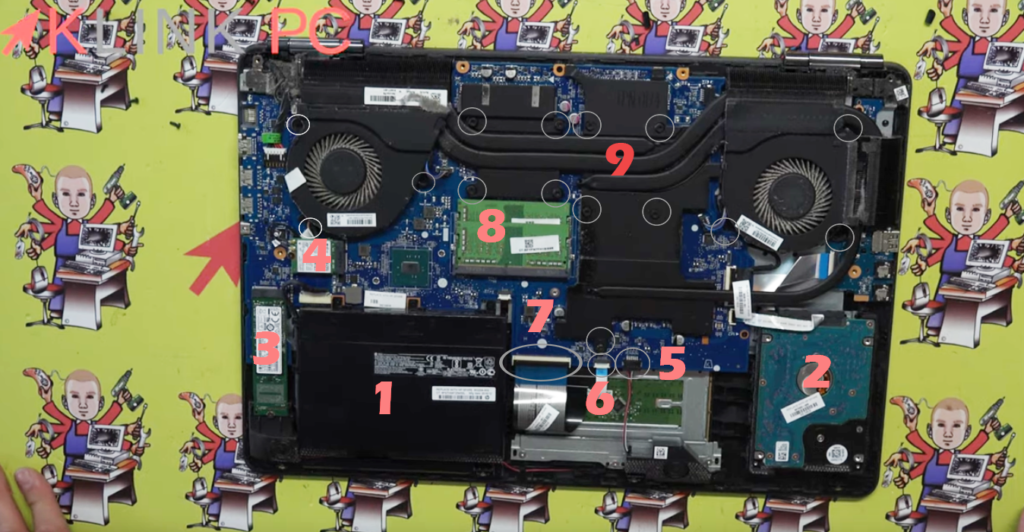
- battery disconnection
- disconnection and removal of the hard drive
- M2 SDD disconnection and removal
- disconnection and removal of the wifi card: identify the color of the wires to simplify the reassembly of the PC
- disconnection of the speakers
- trackpad disconnection
- keyboard disconnection
- removal of memory bars (optional)
- removal of cooling system screws
Once the cooling system is removed, the remaining layers will continue to be removed:
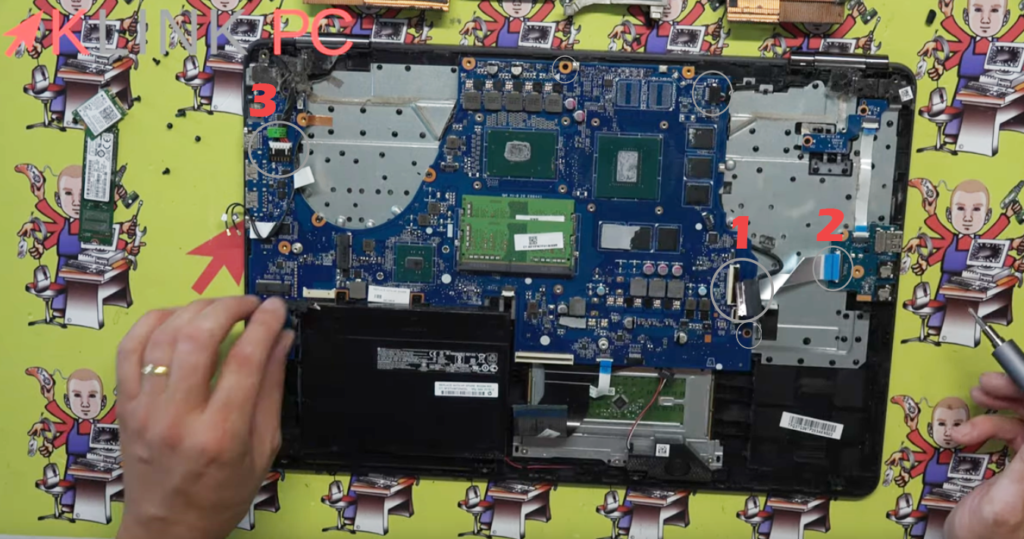
- disconnection of the LCD screen cover
- button and USB disconnection
- power disconnection
- the other grey circles are the screws of the motherboard to be removed
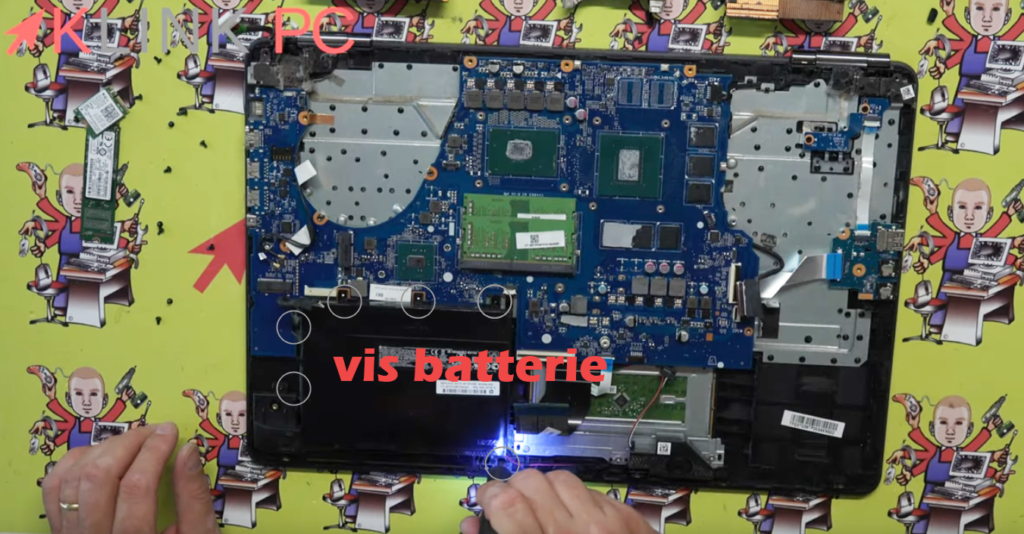
At this point, we are approaching the removal of the motherboard but the battery screws remain to be removed:
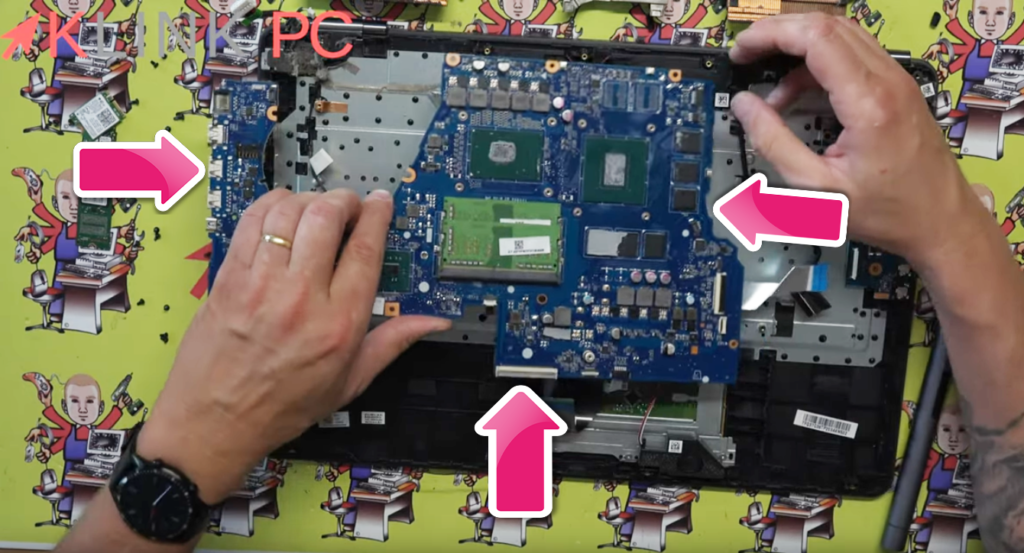
Once the battery is removed, the motherboard can be removed:
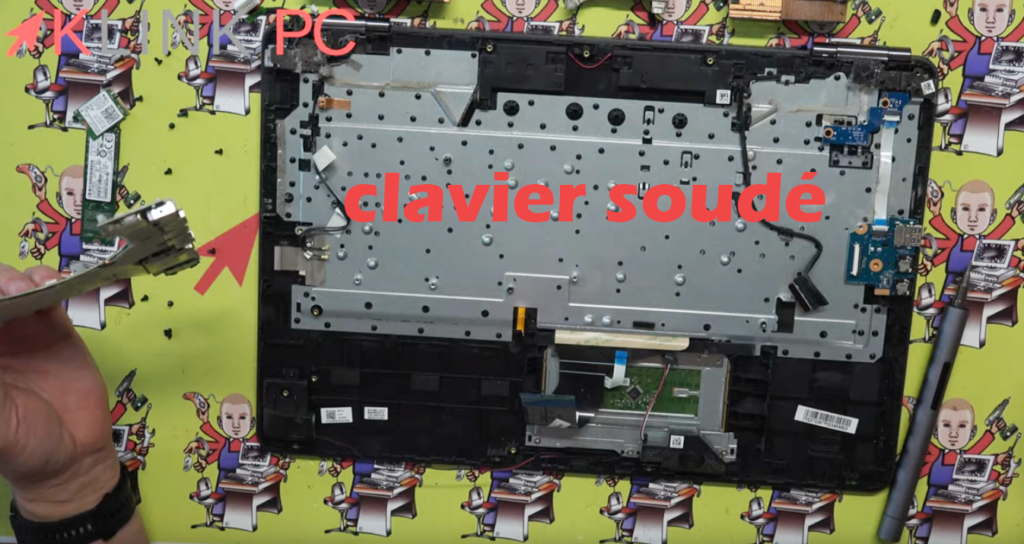
On this laptop, we see that the keyboard is welded on the top part which will force either to break the pins or to completely change the plasty if you want to replace the keyboard:
For reassembly, it will be necessary to proceed in the opposite direction.
Thank you for reading the article to the end.
Feel free to give me a feedback in the comments!
See you soon 😉