How to Disassemble an Asus S56C Laptop
In this article we will see the process of disassembly of the Asus S56C laptop step by step in order to repair or clean it.
Tools used in this video:
- my disassembly tool: http://bit.ly/35pQoW9
- my electric screwdriver: https://amzn.to/3aiDx9B
To start, we will remove the battery by pushing the following buttons:
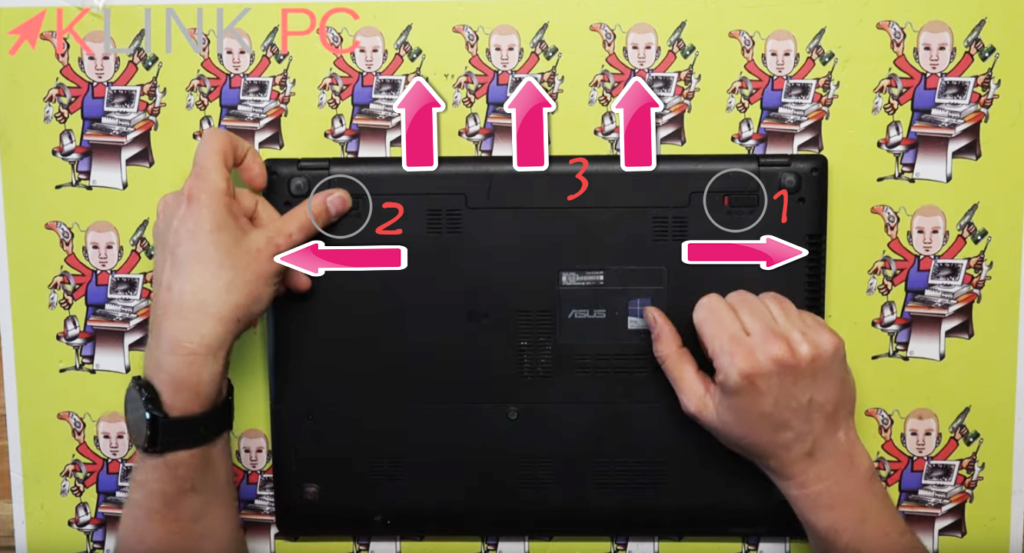
- Put the button to the right and let the red symbol appear
- Hold the other button on the left
- Push the battery out of position
Next, we will remove the two screws from the rear cover to access the hard drive and memory strips:
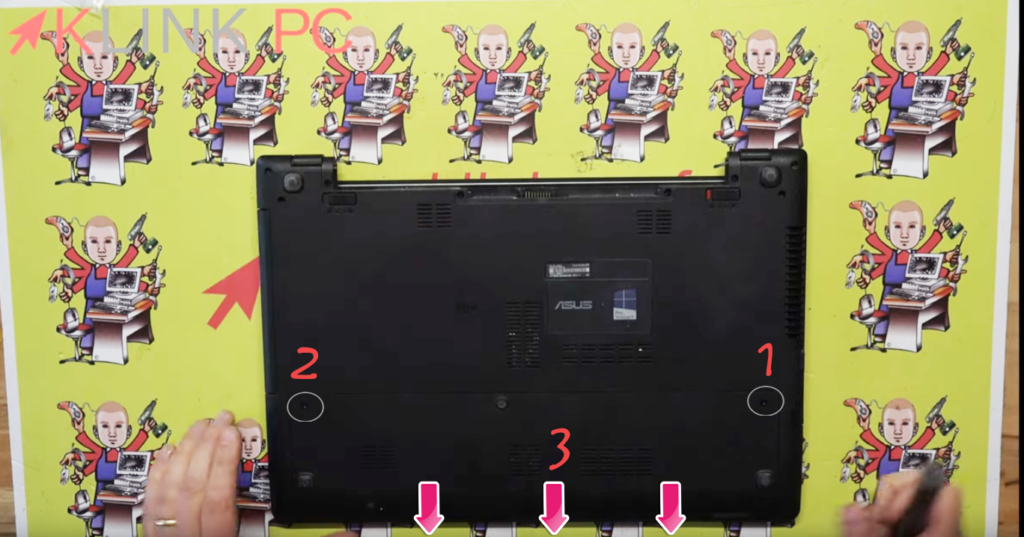
- Remove the screw 1
- Remove the screw 2
- Move the cover down to remove it
Once the rear cover is removed, you will see the following:
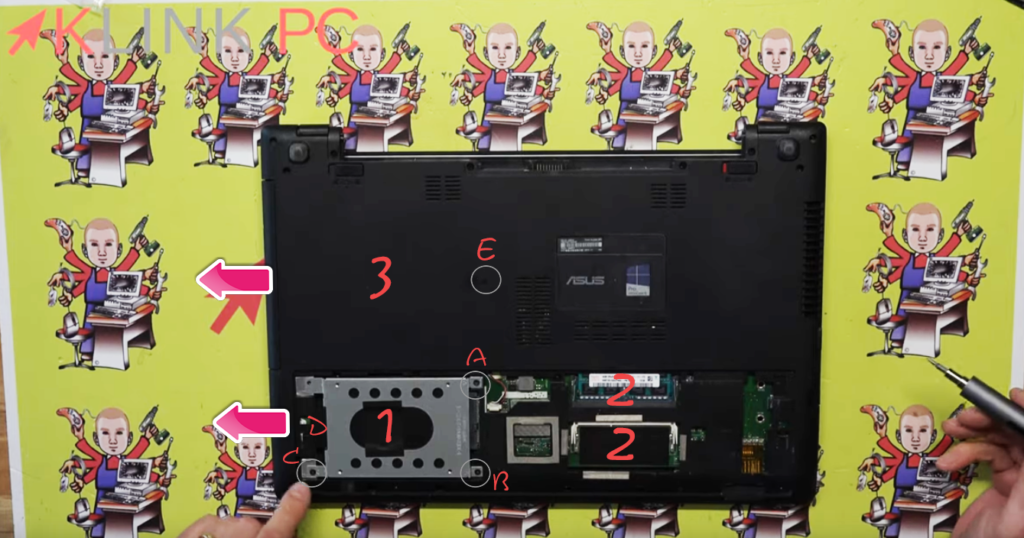
- Hard Drive Location
- Location of memory modules (an empty location to possibly increase RAM)
- CD Drive Location
- A+B+C: the three screws to be removed to pull out the hard drive with the tab (D) outwards, on the left
- E: there is a screw hidden under the buffer that holds the CD drive
- Once the screw is removed, pull the CD drive to the left to disconnect it
Once these elements are removed, all screws on the back plastic part can be undone:
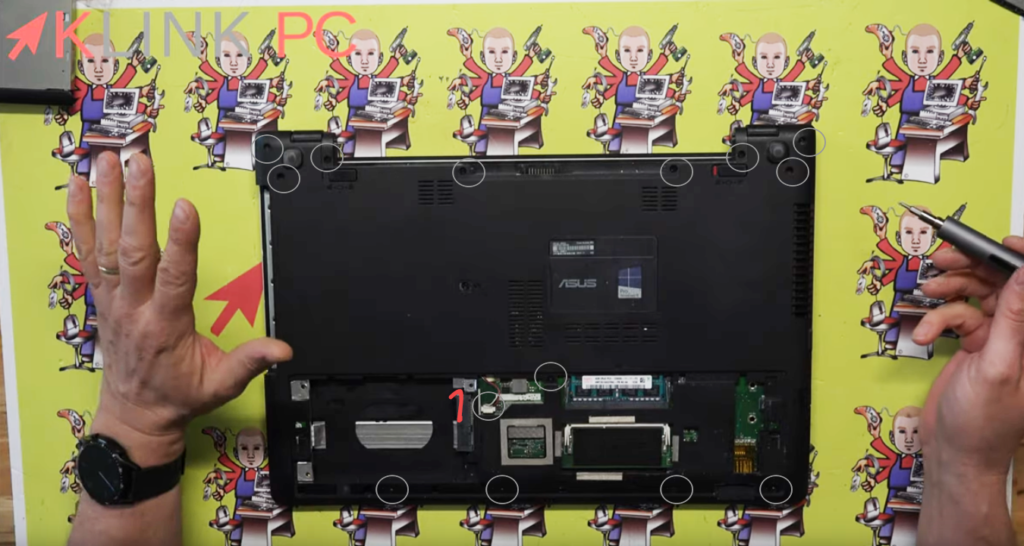
- Speakers to be disconnected at the connector
- All screws to be removed are circled in grey
Once all these screws are removed, we put the PC on the slice to spread out the plastic parts using my buying tool here:
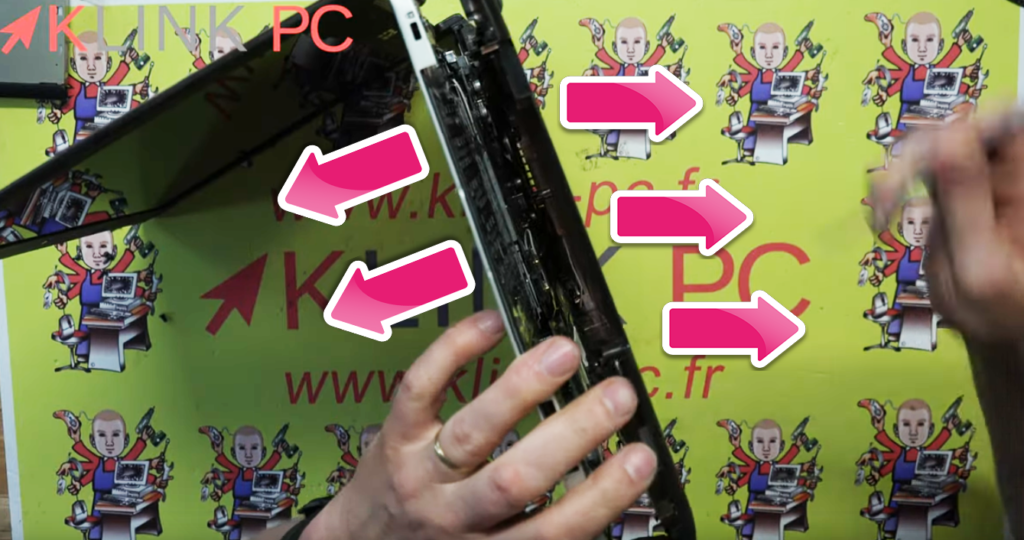
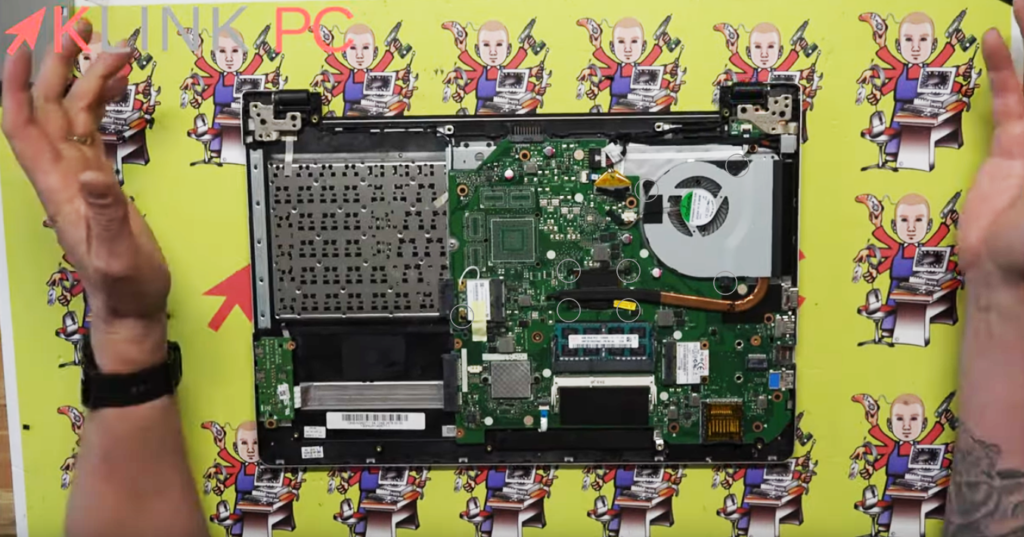
At this point, we arrive on the motherboard and we discover the following elements:

- The cooling system
- The processor
- The Wifi card
- The Sandisk memory module
- The LCD screen connector to disconnect
- The power connector to disconnect
- The PC power button cover to disconnect
- The fan connector to be disconnected
Once these elements are disconnected, we will be able to unscrew them to remove them from the motherboard:
Now, just remove the screws marked with a white arrow that hold the motherboard:
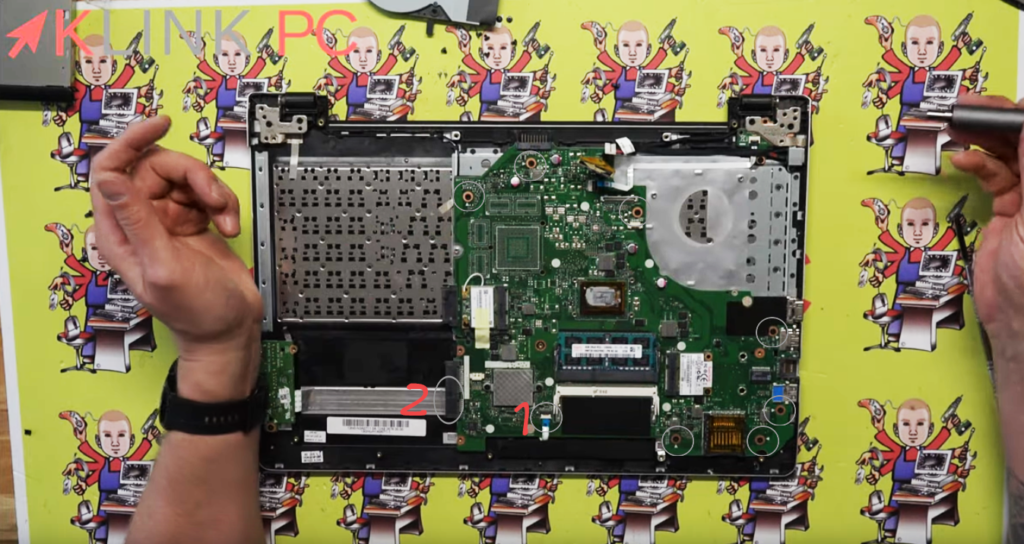
- Disconnection of the ribbon cable
- Disconnecting another ribbon cable that matches the USB ports
- All other grey circles match the screws to be removed to remove the motherboard
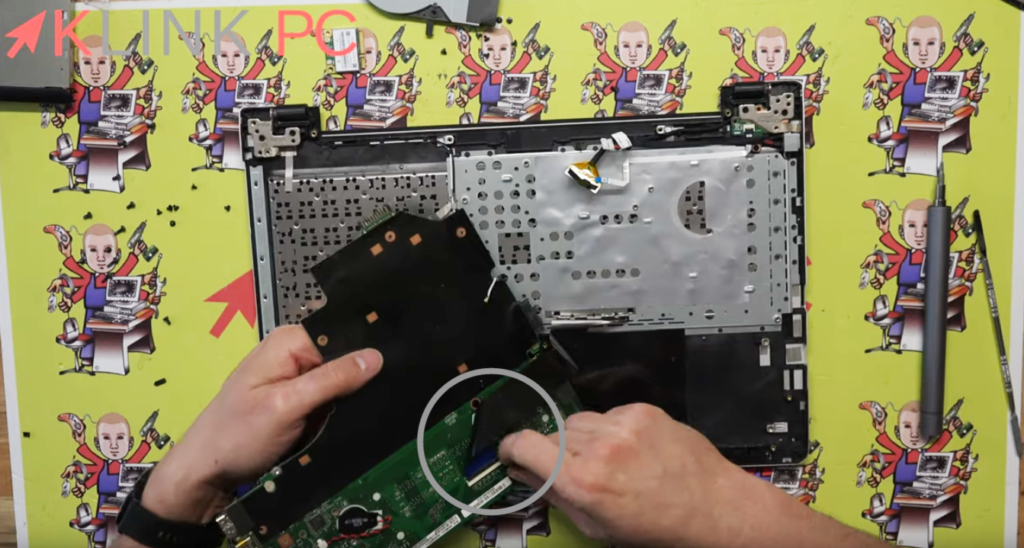
Be careful however when removing the motherboard, there is the ribbon cable of the keyboard behind so do not pull:
As often at Asus, the keyboard will be difficult to change because it will be necessary to break the plastic pins or otherwise change the whole lower part of the PC:

Finally, we find ourselves on the unbundled motherboard and here are the latest connectors for information:
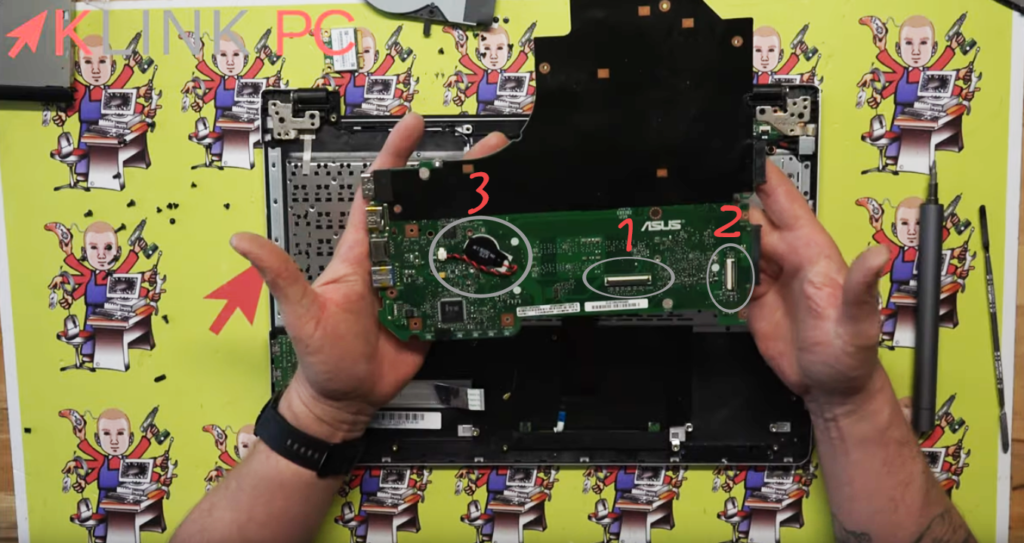
- The connector of the keyboard
- The connector of the USB ports
- The BIOS Battery
For reassembly, it will be necessary to proceed in the opposite direction.
Thank you for reading the entire article and invite you to leave a comment!
See you soon ????