How to Disassemble an Asus R541U Laptop
Sommaire :
How to Disassemble an Asus R541U Laptop
In this article, we will proceed with the disassembly of the Asus R541U laptop step by step in order to repair or clean it.
Tools used in this video:
Removal of the upper part
To begin, we turn the computer and we will first remove all the screws of the rear plastic parts:
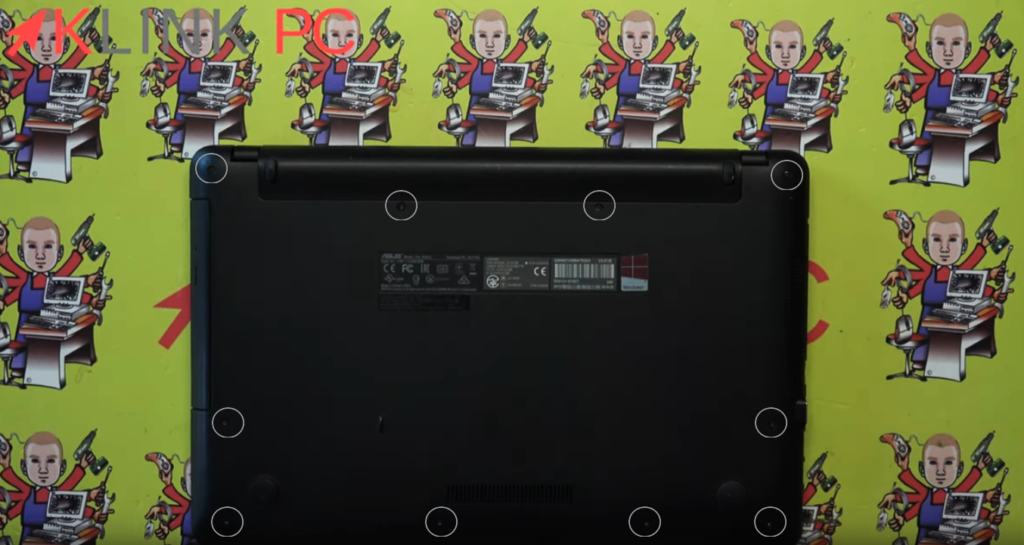
Once all the screws are removed, we will put the PC on the slice and discard the plastic parts here on the CD player side:
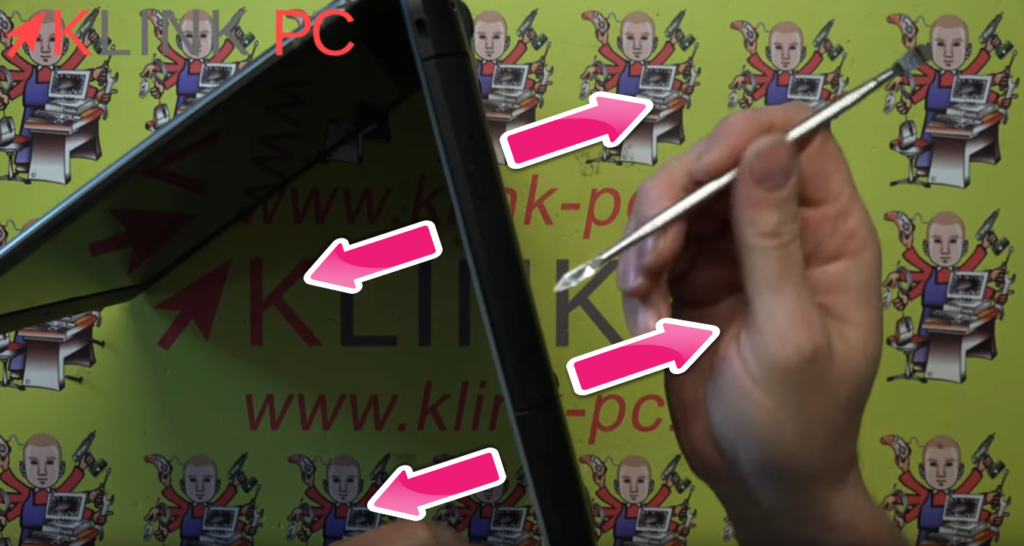
To do this, we will use a disassembly tool that can be bought on my shop and declip by making back and forth movements in this way.
It is important not to abruptly lift the keyboard as there are two connecting strips behind:
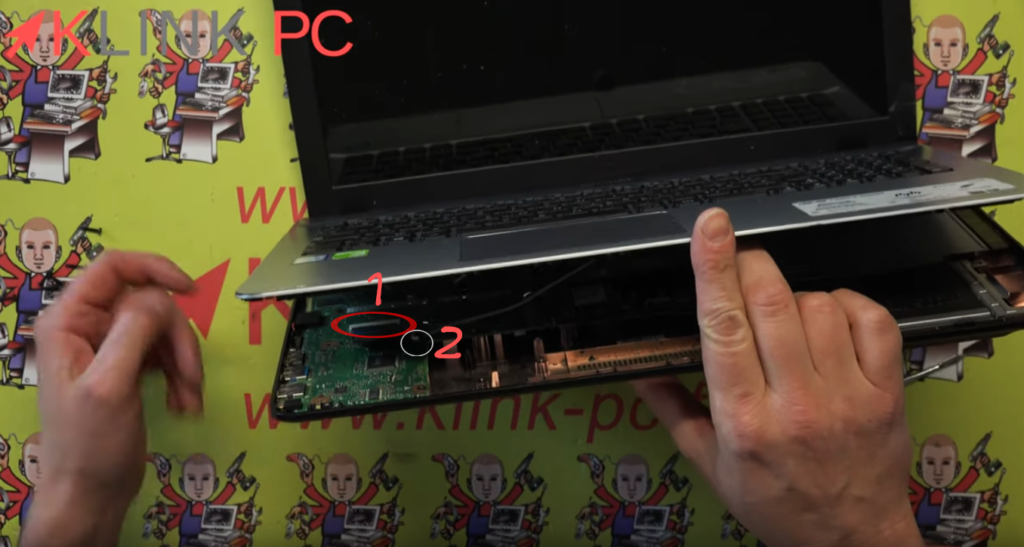
- Keyboard connector to be lifted and cable to be removed
- Trackpad connector to be lifted and cable to be removed
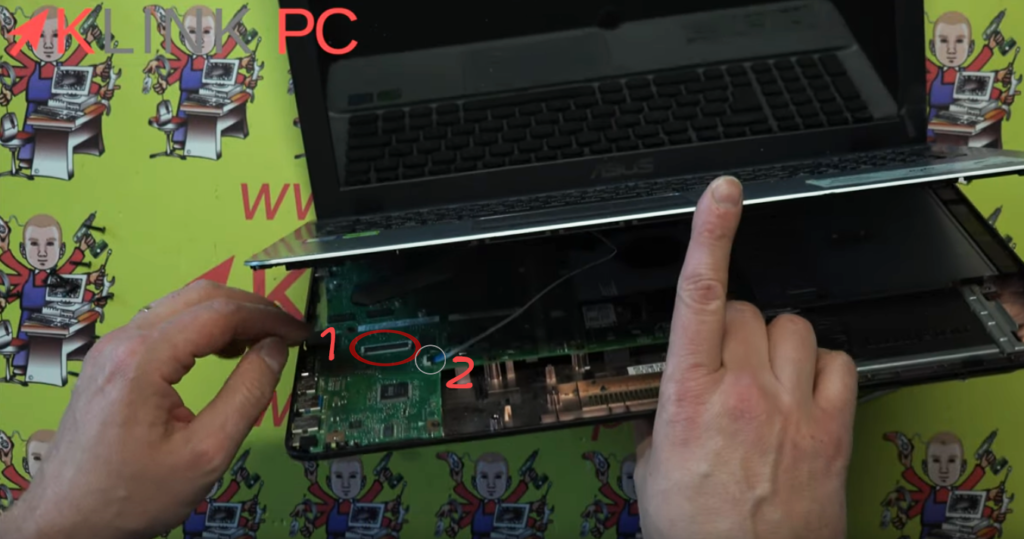
Only after these two connections are removed, the upper part can be removed.
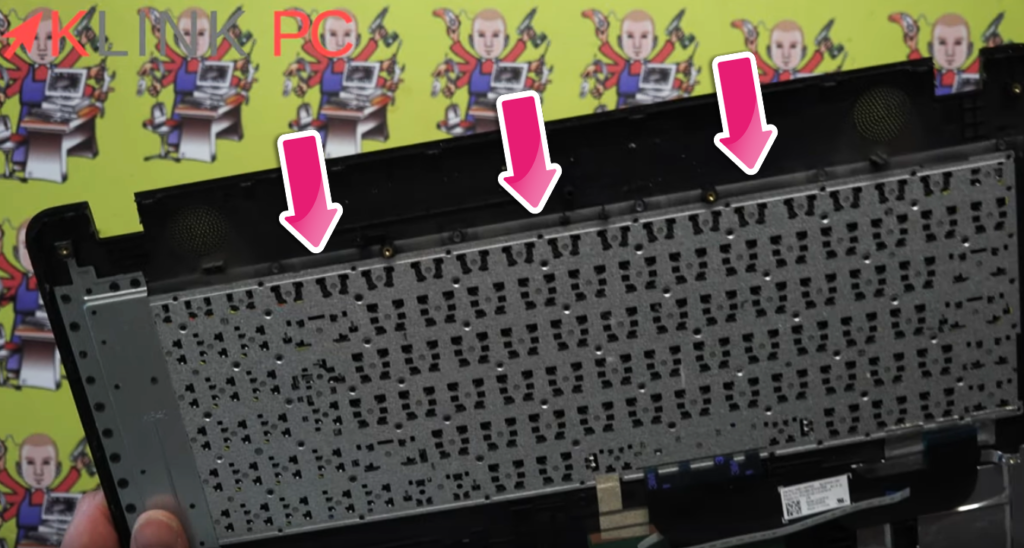
Changing the keyboard
If you want to change the keyboard, you will need:
- either change the top part,
- Either find another keyboard, declip all the little pins and try to solder them or reattach the keyboard.
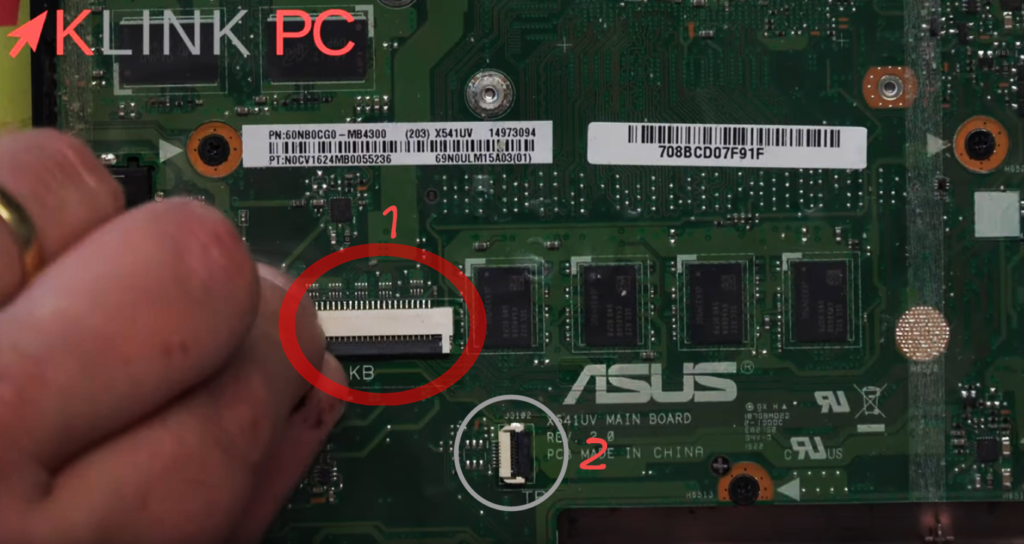
How to undo a connection
As I explained to you about the connectors, you just have to lift here to be able to undo the keyboard and the same for the trackpad, you just have to lift the connectors:
Front view on the motherboard
After these operations, we arrive on the motherboard:
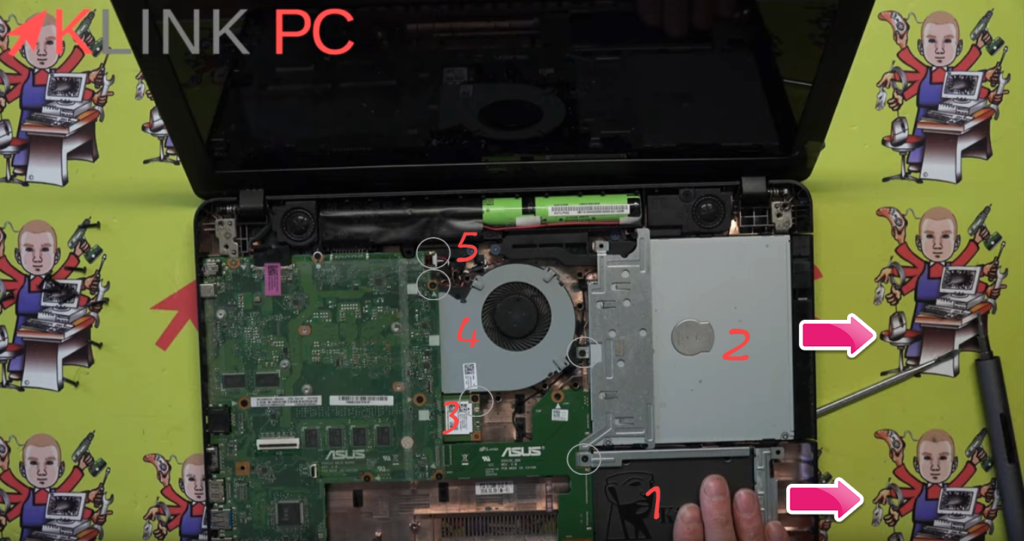
- The hard drive and its associated screw (in grey): once defeated, you have to push the drive to the right to take it out
- The CD drive and its associated screw (in grey): once defeated, you must push the CD drive to the right to take it out
- The wifi card and its associated screw (in grey): once defeated, you must open the card and take it out to the right
- The fan and its associated screw (in grey)
- The speaker connector (in grey)
Finally, the next step will be to unscrew all the screws marked with a white triangle because they symbolize the screws of the motherboard:
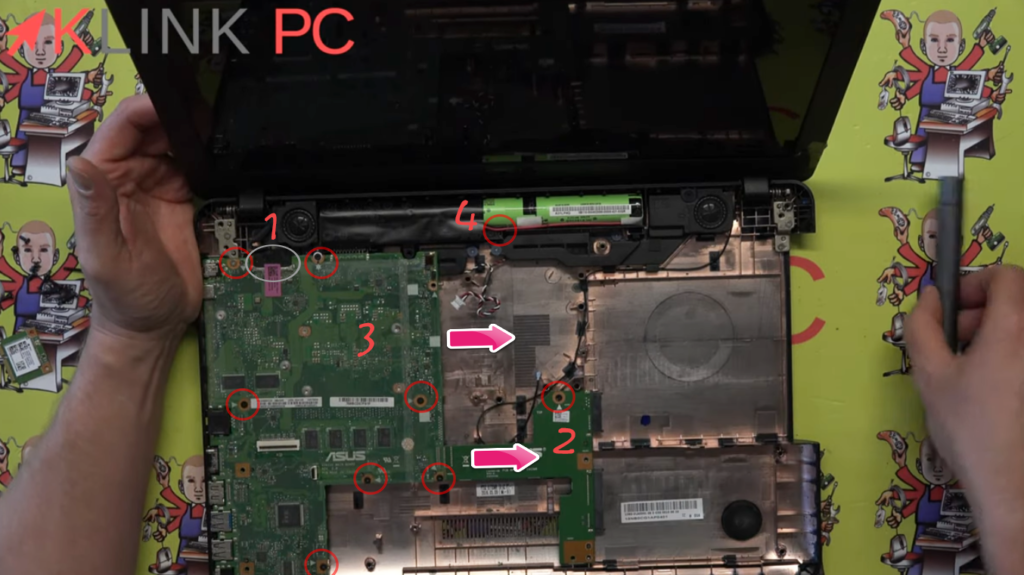
- In red, there are the screws to remove from the motherboard
- The LCD connector to disconnect
- The part holding the hard drive to push to the right
- Motherboard location to be exited by pulling to the right once all unscrewed and disconnected
- The battery and its associated screw
Back view on the motherboard
Here we are on the back of the motherboard:
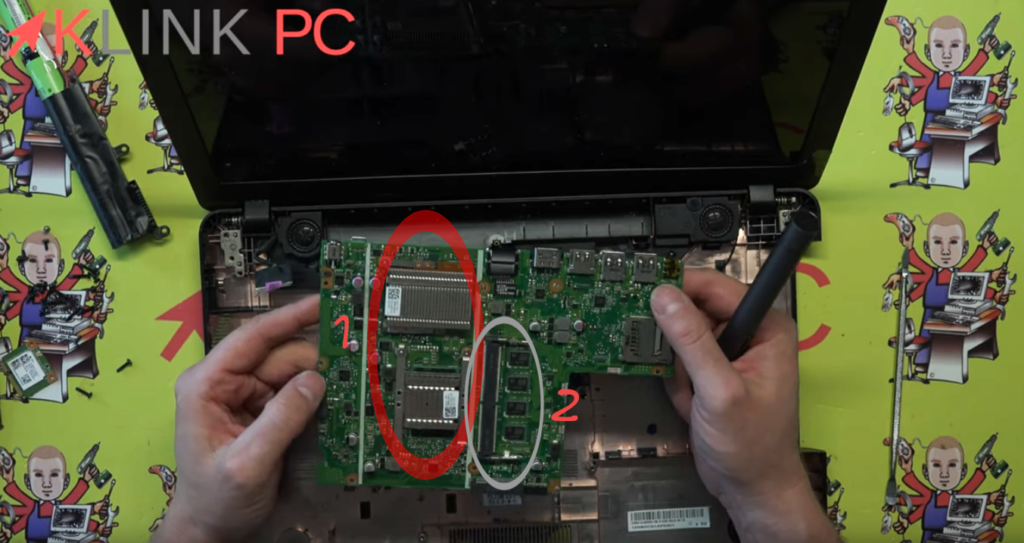
- Processor and chipset location
- Location of an additional memory strip holder
Conclusion
So much for the complete disassembly of this Asus R541U laptop.
For reassembly, it will be necessary to proceed in the opposite direction.
I hope this article has been useful to you.
Thank you for reading the entire article and feel free to leave a comment!
See you soon ????
See all PC disassembly videos