How to Disassemble an Acer Aspire E5-511 Laptop
In this article we will look at the process of disassembly of the Acer Aspire E5-511 laptop step by step in order to repair or clean it.
Tools used in this video:
- my disassembly tool: http://bit.ly/35pQoW9
- my electric screwdriver: https://amzn.to/3aiDx9B
To begin, you will need to remove the battery using this mechanism:
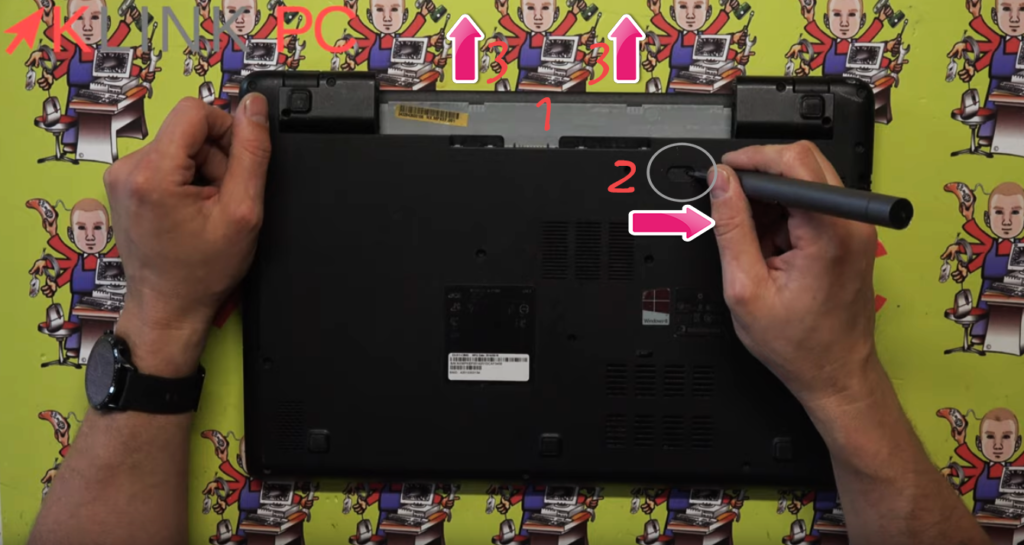
- Location of the battery
- Push the button to the right and hold it
- Push the battery out of position
Then we will remove the CD drive and all the screws of the rear surgery:
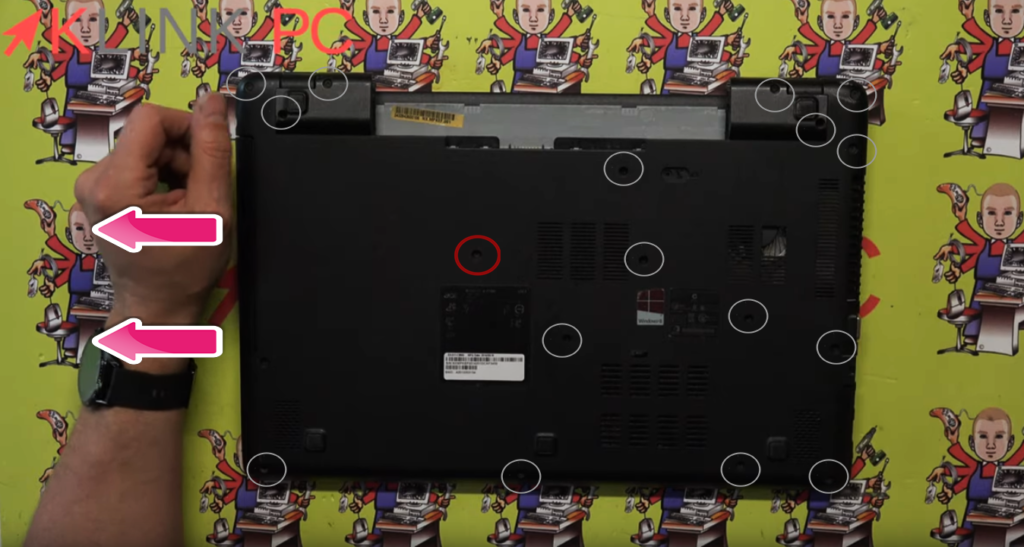
- The red circle shows the screw to be removed to remove the CD drive
- The grey circles show the screws securing the rear cover
Once all the screws have been removed, the two plastic parts will be removed by separating in this way, using my disassembly tool:
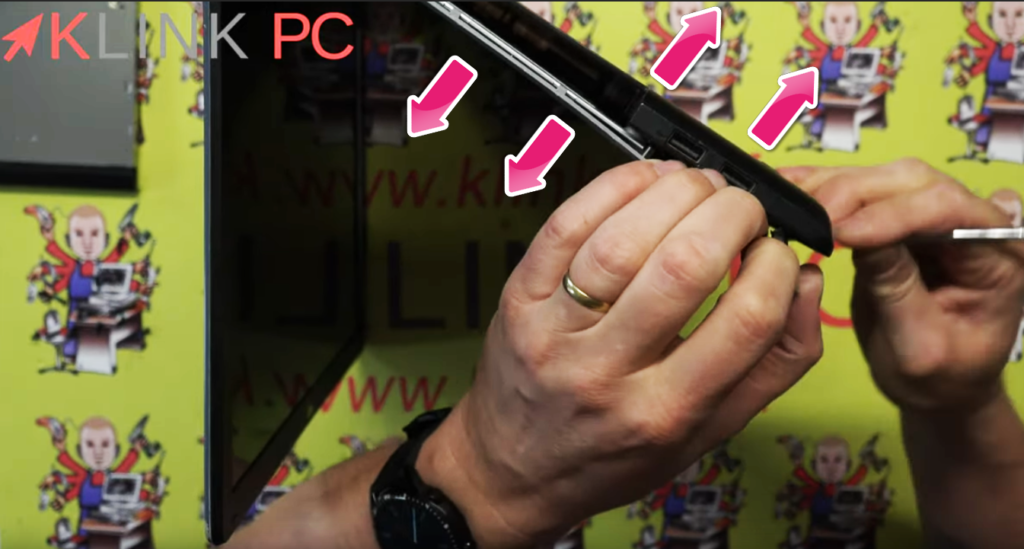
Do not pull too hard because the keyboard is attached to the motherboard:
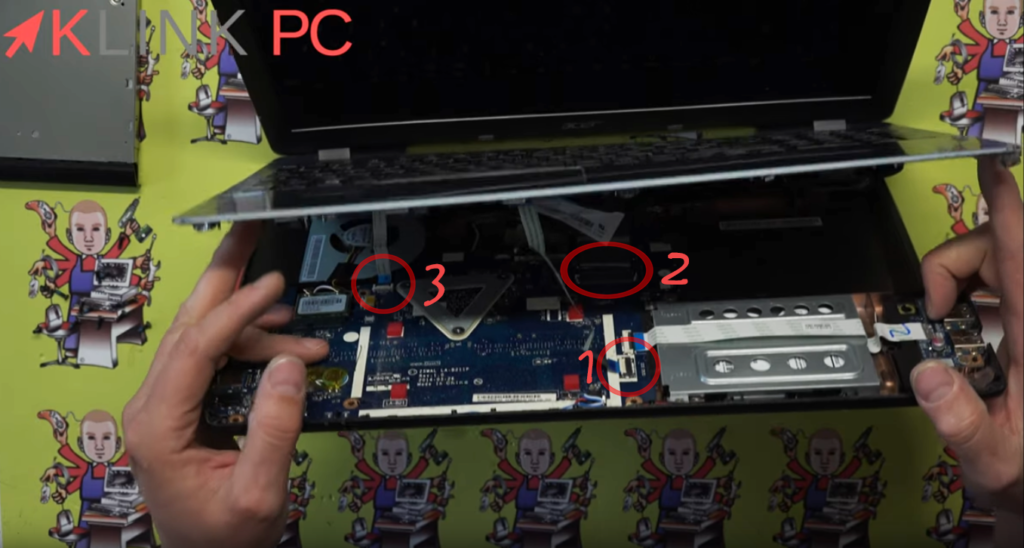
- Trackpad cable to be disconnected by lifting the white connector and pulling the blue plastic part
- Keyboard cable to be disconnected the same way
- On/off button cable to be disconnected in the same way
Once these connectors are undone, the top can be removed:
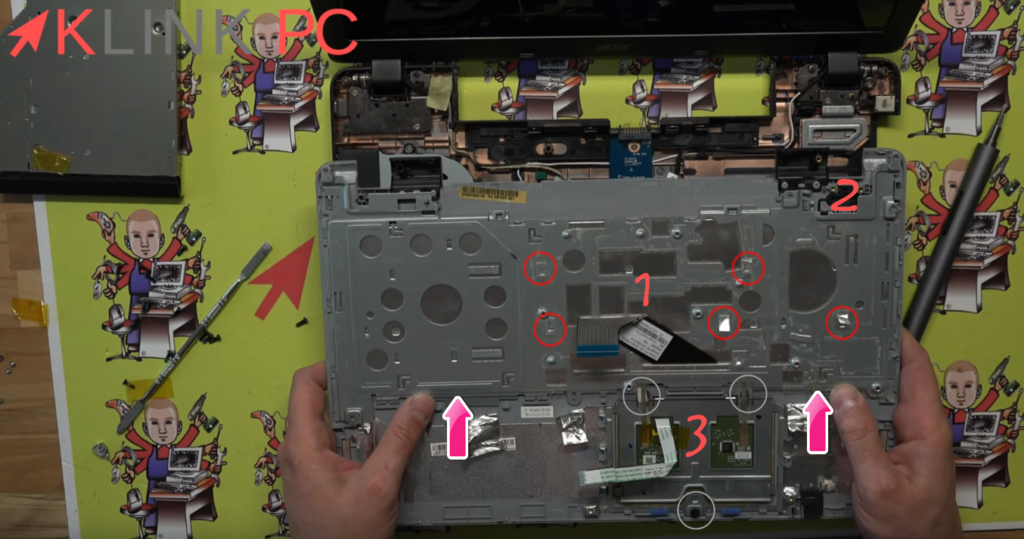
- Location of the keyboard and associated screws (red circles): to remove the keyboard, push it upwards after the screws are removed
- Location of the on/off button to be removed
- Trackpad location and associated screws (gray circles)
Here we are on the motherboard:
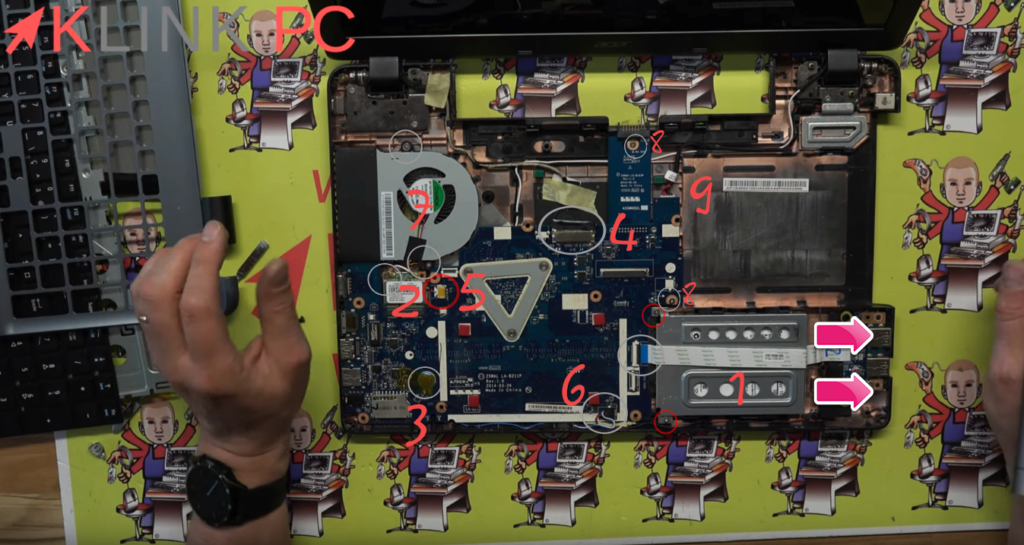
- Hard Drive Location and Associated Screws (Red): When the hard drive is undone, it must be pushed to the right to pull it out
- Location of the wifi card and its associated screw (in grey): before disconnecting it, note the side of the black cable, this will avoid getting the color codes wrong when reassembling. To disconnect the wifi card, we gently pull the wires, remove the screw and we can recover our wifi card.
- Location of the bios stack which has the particularity of being welded
- LCD connection location to be removed
- Location of the fan connector to be removed (in red)
- Speaker connector location to be removed (gray)
- Location of the ventirad and the two associated screws (in grey) to be removed
- Location of screws securing the motherboard
- Motherboard power connector location to be undone
Then we discover two new elements:
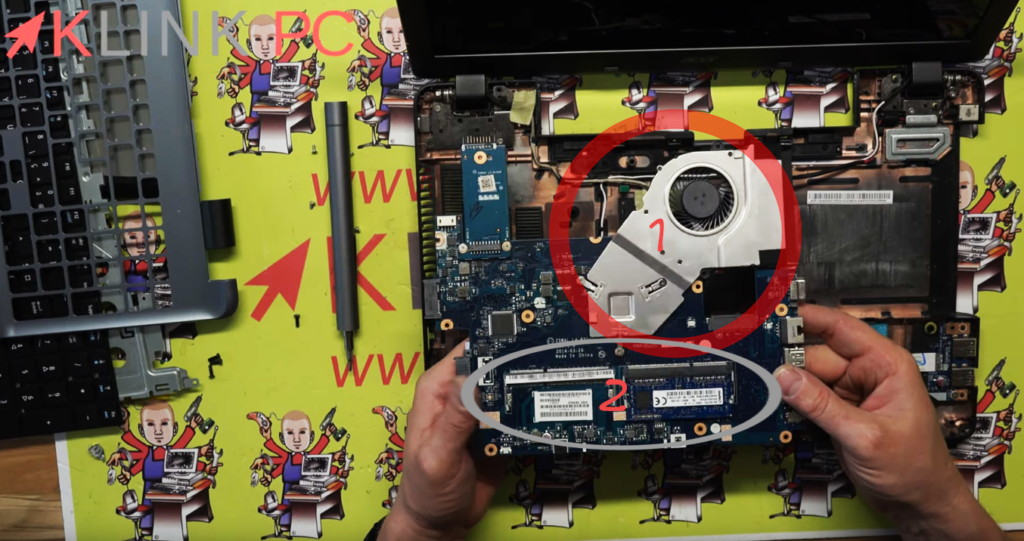
- Location of the cooling system
- Location of Two Memory Bars (RAM)
Now we will remove the screws from the hinges:
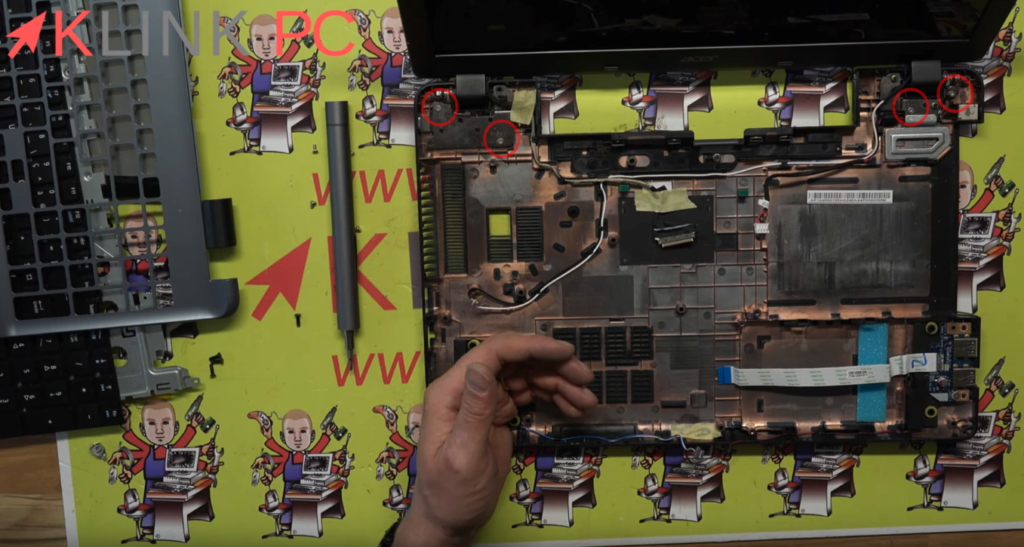
- Location of the four screws of the hinges to be removed (in red)
- Also remember to remove black and white cables from wifi
You can remove the plastic part that hides the contours of the screen:
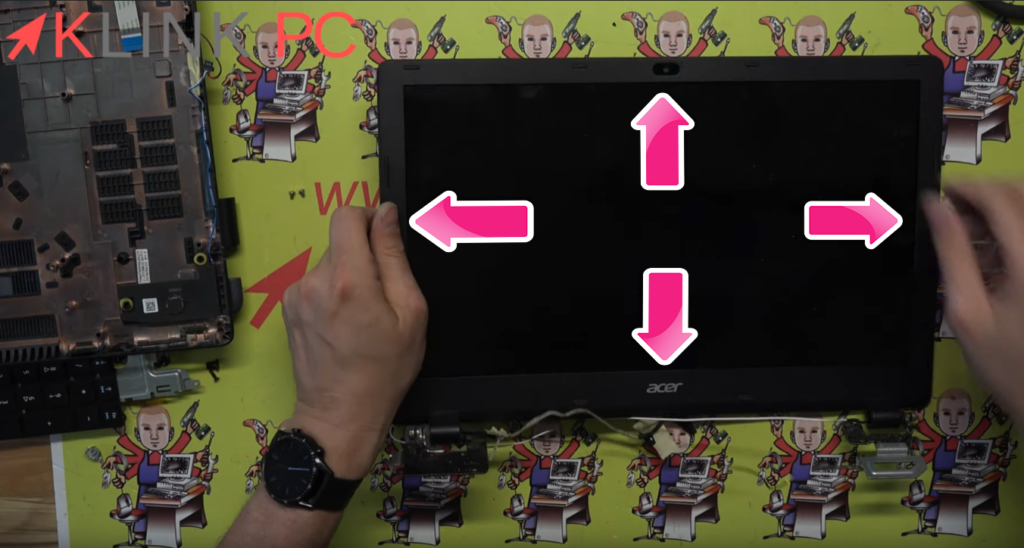
To take out the screen, just gently declip the plastic part around.
Then the screws securing the monitor are released:

- There are four screws to undo (in red) to remove the screen
Be careful when removing the screen because there is a connector on the back:

So much for the complete disassembly of this Acer Aspire E5-511 laptop.
For reassembly, it will be necessary to proceed in the opposite direction.
I hope this article has been useful to you.
Thank you for reading the entire article and feel free to leave a comment!
See you soon ????