How to disassemble a Lenovo G780 21B2 laptop
In this article we will see the process of disassembly of the Lenovo G780 21B2 laptop step by step in order to repair or clean it.
Tools used in this video:
- my disassembly tool : http://bit.ly/35pQoW9
- my electric screwdriver : https://amzn.to/3aiDx9B
For starters, we’re gonna flip the PC and we’re gonna take out the battery:
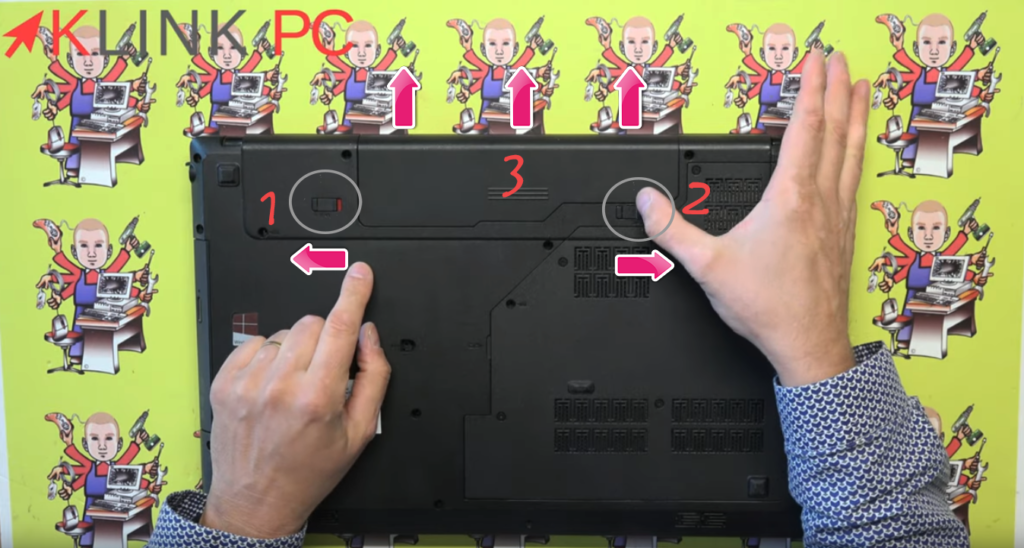
- Push the button to the left and let the red symbol appear
- Hold the other button by pushing it to the right
- Push the battery out of position
To continue, we will open the hood:
- Circles in red show the screws holding the keyboard
- The grey circles show the screws securing the rear cover
- Shift the cover to the right by lifting it a little to declip it
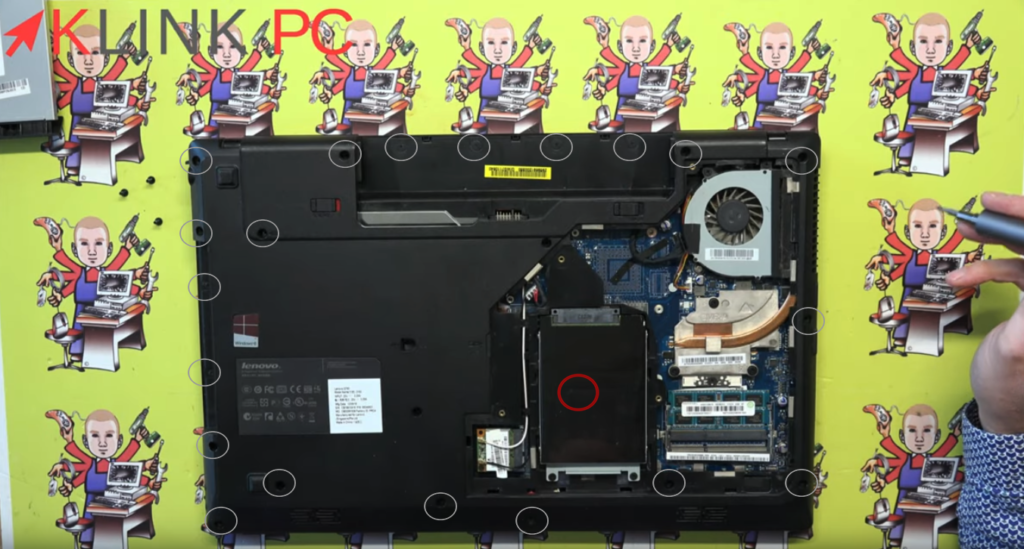
Once the rear cover is removed, you will see the following:
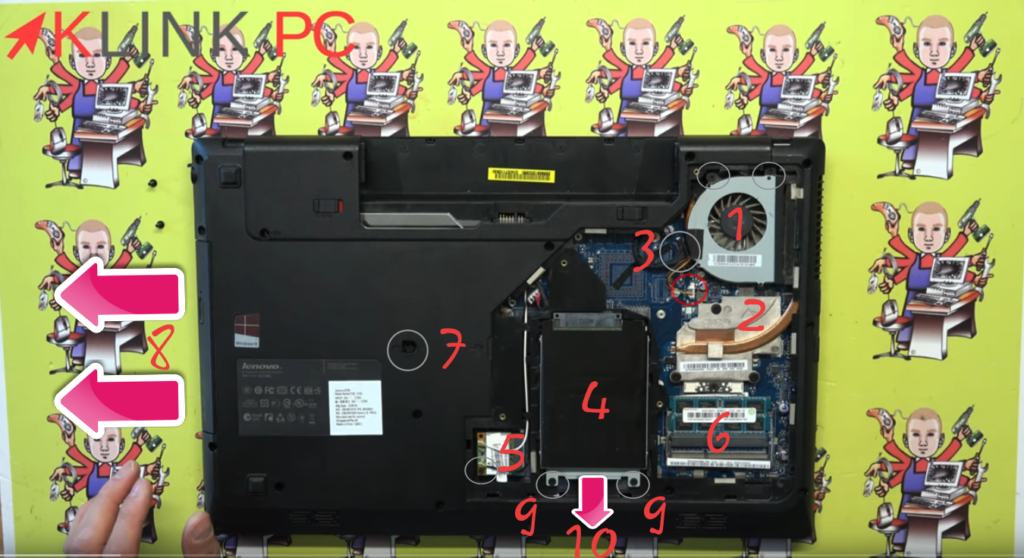
- Fan Location: Remove the two fan screws (gray circles above) and disconnect the connector (red circle)
- Location of the processor and its cooling system
- LCD cable location: to be disconnected
- Hard Drive Location: Remove the two screws (9)
- Location of the wifi card: remove the screw (gray circle next to it)
- Memory Bar (RAM) Location
- Screw location that holds the CD drive
- Once the screw is removed (7), push the CD drive to the left to move it out of position
- Location of screws securing the hard drive
- Once these screws are removed (9), pull the hard drive down with the plastic tab provided
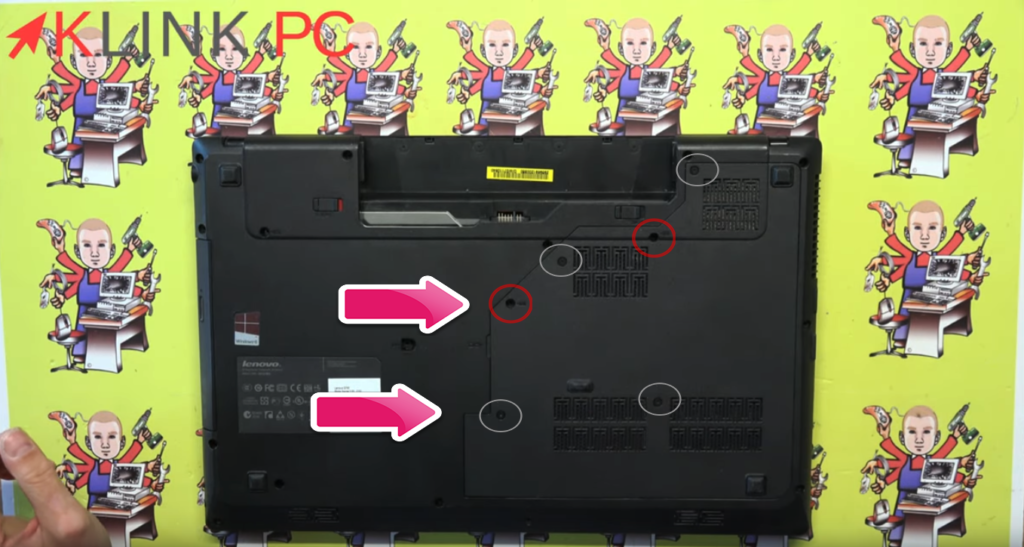
To continue, we will remove all the screws from the back plastic part:

- Grey circles are the screws to be removed
- The red circle corresponds to a screw located under the hard disk
Then, we return the PC to access the keyboard that we will remove:
We will press the pins that hold the keyboard using the tool.
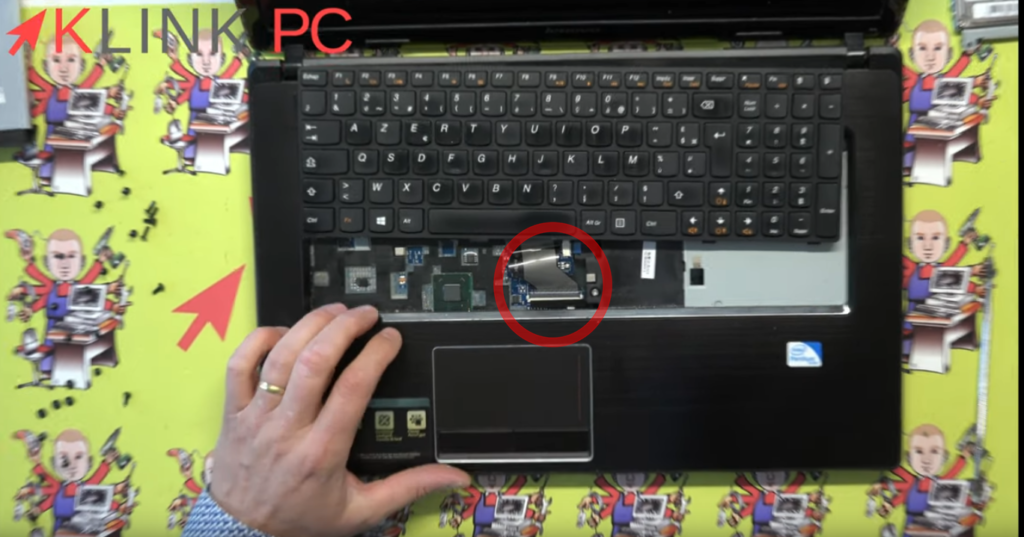
To remove the ribbon cable, simply lift the black connector and the cable can be gently pulled to remove the keyboard.
Then we will remove the remaining screws:
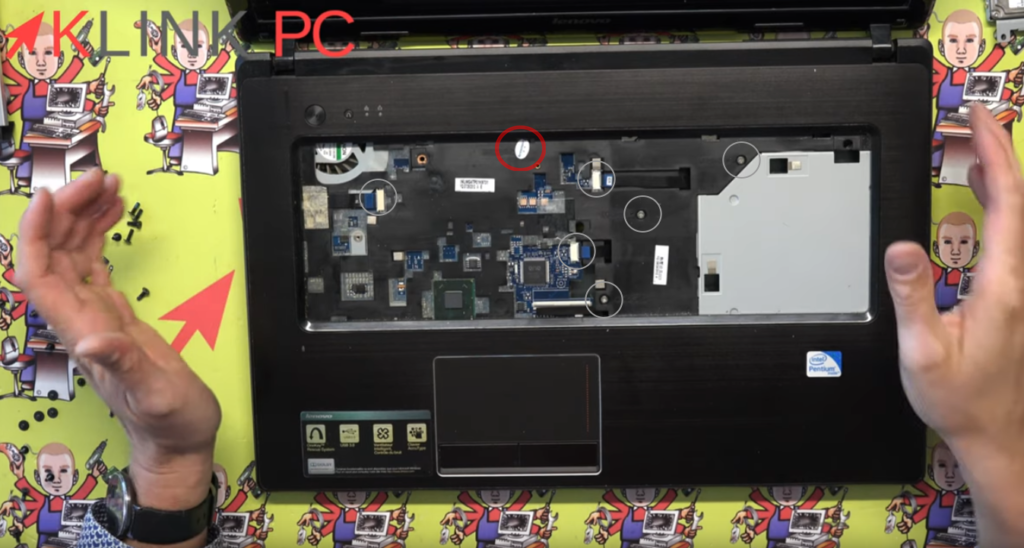
- Gray circles correspond to screws and connectors to undo
- The red circle corresponds to the Lenovo warranty label which hides a screw underneath to be removed also for disassembly
Once all these screws are removed, we put the PC on the slice to spread the plastic parts using my tool:
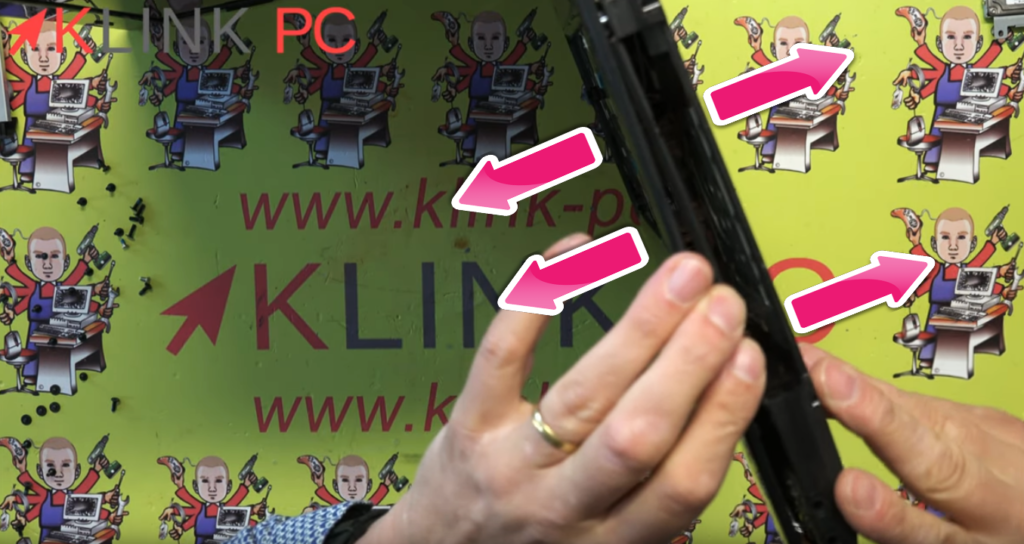
Note : if this forces, it may be that you forgot a screw during disassembly!
The upper part of the PC can be separated:
First, we will turn the PC and de-clip the cables of the wifi card to facilitate the disassembly.
You must never pull the cables but always pull the connection properly in itself or you risk tearing everything up.

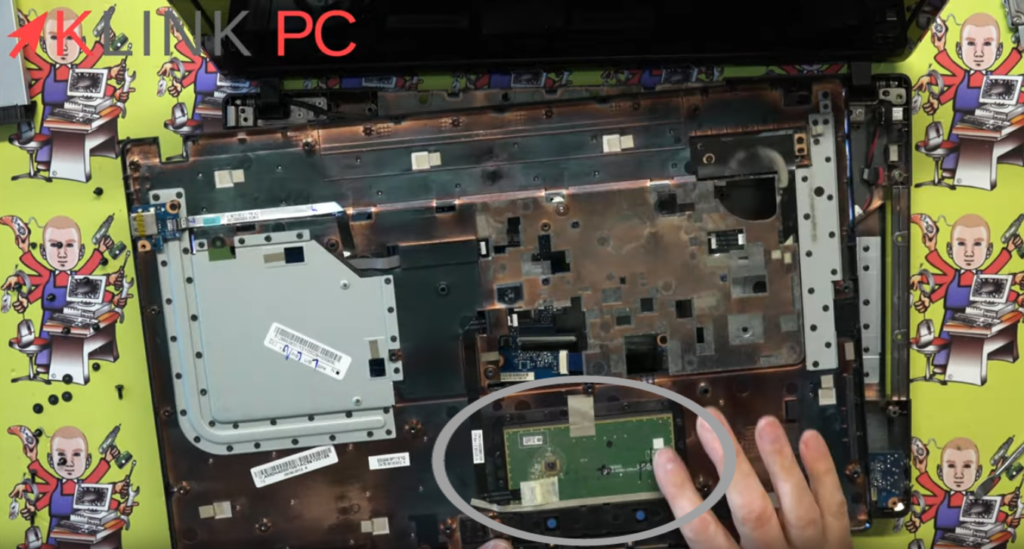
At this point, we arrive on the motherboard and we discover the following elements:
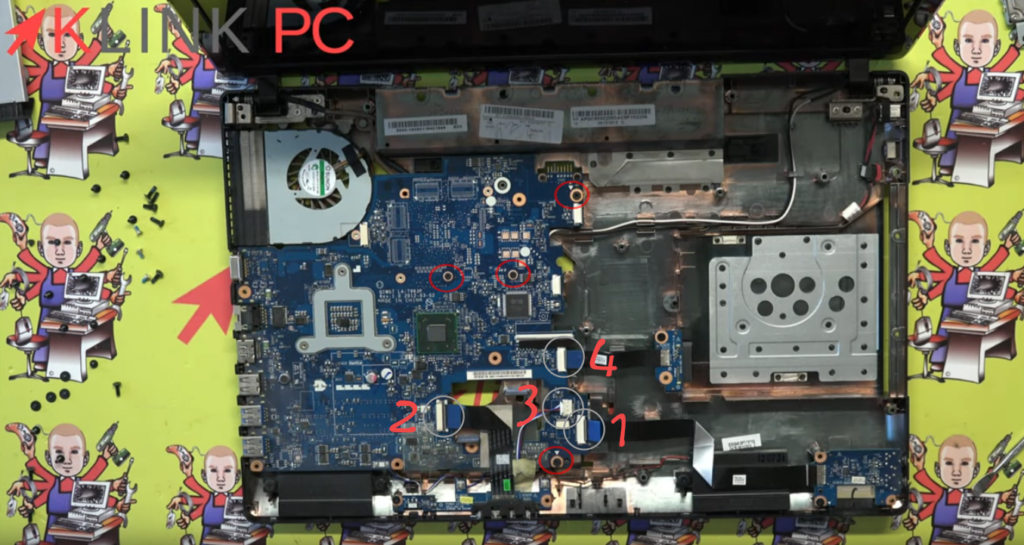
- Disconnect the jack cable by lifting the connector and pulling the blue tab
- Disconnect the trackpad by lifting the connector and pulling the blue tab
- Disconnecting the speaker cable by pulling the connector directly and not on the wires
- Disconnect the CD drive cable by lifting the connector and pulling the blue tab
- The red circles correspond to the screws to be removed to take out the motherboard. They are marked with a small white arrow.
Once all the screws are removed, just gently lift up the motherboard:
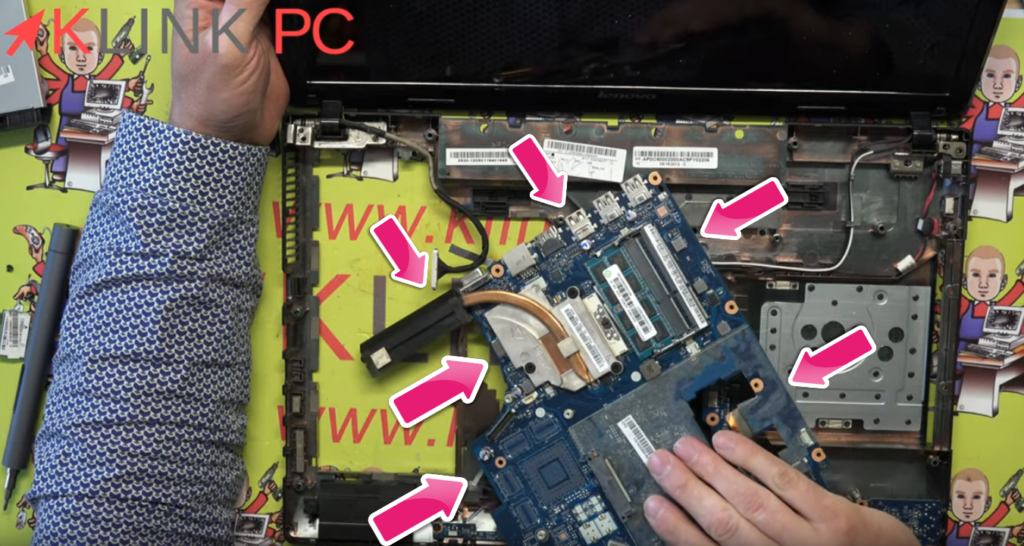
For reassembly, it will be necessary to proceed in the opposite direction.
I hope this article has been useful to you.
Thank you for reading the entire article and feel free to leave a comment!
See you soon ????